
Recap
In the last blog post, I wrote about the initial implementation of the Calendar-To-Mite script. So far, we created a small NodeJS script which is fetching Google Calendar events, maps them to particular service, and project ids inside Mite and automatically creates time entries for them.
If you haven’t checked out the last blog post, I highly recommend you to start from there: https://moritzwachter.de/2020/calendar-to-mite-part-1/
I finished last time by telling you that there’s a lot of cleaning up to do additionally to some extra features which might come in handy. So this is what you can expect from the next blog posts: Refactoring, testing, and adding new features.
Single-responsibility principle
The codebase consists of two files at the moment: googleAuth.js and calendar2mite.js. But if we take a closer look, we are doing a lot more than only two things:
- Connect to Google
- Get Calendar events
- Map events to Mite projects and services
- Add time tracking entries to mite
PLUS some helper methods for formatting Date objects.
That means we already broke the first of the five SOLID-principles:
S for Single responsibility.
Our job is to identify what the responsibility of each line is and how to cluster them into classes.
So, let’s grab a coffee and talk about code!
Step 1: Configuration
There might be a point in time in one of your small side-projects when you get the feeling that the codebase might become a bit bigger. You want to be able to configure some behavior without changing the code (for example, feature flags or directories). Theoretically, you could load the dotenv library in every file and access the environment variables directly but instead I wanted to centralize the initialization, so my first step is to create a Config.js:
require('dotenv').config();

module.exports = Object.freeze({
    MITE_API_KEY: process.env.MITE_API_KEY,
    MITE_ACCOUNT: process.env.MITE_ACCOUNT,
    INPUT_PATH: process.env.INPUT_PATH,
    GOOGLE_AUTH_DIRECTORY: process.env.GOOGLE_AUTH_DIRECTORY
})
Now, we can require Config.js in every module where it is needed, or even just the constant that is needed.
// Option 1
const config = require('./Config');
const directory = config.GOOGLE_AUTH_DIRECTORY;
const credentialsPath = directory + 'credentials.json';

// Option 2
const {GOOGLE_AUTH_DIRECTORY} = require('./Config');
const credentialsPath = GOOGLE_AUTH_DIRECTORY + 'credentials.json';

// Option 3
const {GOOGLE_AUTH_DIRECTORY: directory} = require('./Config');
const credentialsPath = directory + 'credentials.json';
Step 2: Google Auth
You might have noticed the new constant GOOGLE_AUTH_DIRECTORY already. It is used to configure the directory where you want to store your Google Auth credentials. We can now apply the code above to the GoogleAuth.js and replace all variables with credentialsPath and tokenPath:
Step 3: DateTime helpers
One of our main goals in refactoring is to increase the overall code quality (e.g., making the code testable and more natural to comprehend) while not changing the external behavior. This might be especially difficult as we don’t have any tests yet. Although right now, the project is straightforward to test manually, I want to in small steps that I am confident in doing without fear of breaking the functionality. So one of my first steps usually is to extract methods and move methods to separate classes.
If you are using a Jetbrains IDE like Webstorm, PHPStorm, or IntelliJ, make use of the fantastic “Refactor” functionalities and shortcuts!
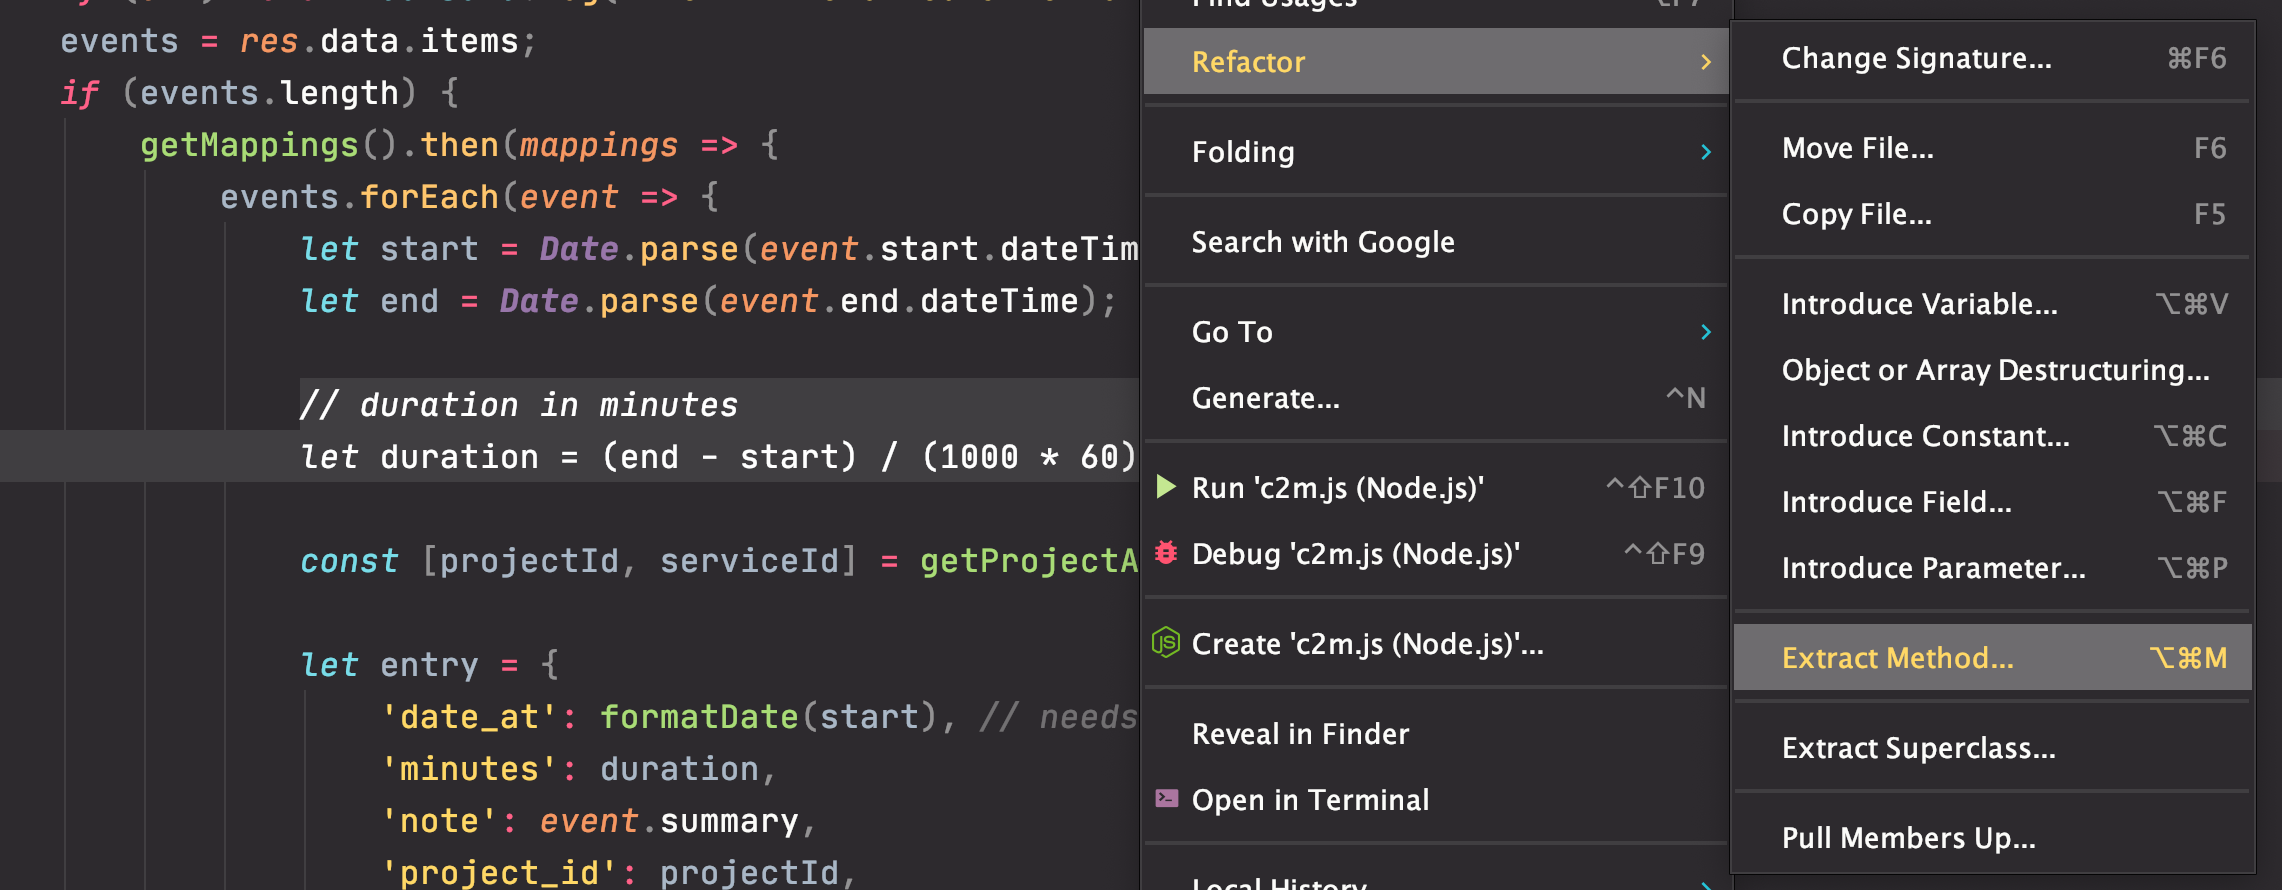
I added a helper method to format a Date object to a formatted YYYY-MM-DD string, which we need for mite. Also, we can move the “get the difference of two Date objects in minutes”-calculation into the same class which I’d suggest to simply call DateTimeHelper.js.
Furthermore, I created two methods for creating the two Date objects for Google Calendar to get the following result:
class DateTimeHelper {
    /**
     * @param {int} amountOfDays
     * @returns {Date}
     */
    getTimeMin (amountOfDays = 7) {
        return new Date(this.getTimeMax().getTime() - (amountOfDays * 24 * 60 * 60 * 1000));
    }

    /**
     * @returns {Date}
     */
    getTimeMax () {
        return new Date();
    }

    /**
     * @param {Date} start
     * @param {Date} end
     * @returns {int}
     */
    getDurationInMinutes(start, end) {
        return (Date.parse(end.toISOString()) - Date.parse(start.toISOString())) / (1000 * 60);
    }

    /**
     * return Date as 'YYYY-MM-DD' string
     *
     * @param {Date} date
     * @returns {string}
     */
    formatDate (date) {
        let d = new Date(date);
        let month = '' + (d.getMonth() + 1);
        let day = '' + d.getDate();
        let year = d.getFullYear();

        if (month.length < 2) {
            month = '0' + month;
        }

        if (day.length < 2) {
            day = '0' + day;
        }

        return [year, month, day].join('-');
    }
}

module.exports = new DateTimeHelper();
Step 4: Google Calendar
Fetching Calendar events and processing them in whatever way we like are two different tasks. So I’d like to separate the API retrieval from the processing. To accomplish this, I created another class GoogleCalendar.js which is now returning a Promise instead:
const {google} = require('googleapis');

class GoogleCalendar {
    constructor (auth) {
        this.calendar = google.calendar({version: 'v3', auth});
    }

    getEvents(timeMin, timeMax) {
        let events = [];

        return new Promise((resolve, reject) => {
            this.calendar.events.list({
                calendarId: 'primary',
                timeMin: timeMin.toISOString(),
                timeMax: timeMax.toISOString(),
                singleEvents: true,
                orderBy: 'startTime',
            }, (err, response) => {
                if (err) reject('The API returned an error: ' + err);

                events = response.data.items;
                if (events.length) {
                    resolve(events);
                } else {
                    reject('No events found.');
                }
            });
        });
    }
}

module.exports = GoogleCalendar;
Now that we have Promises inside getEvents we can simplify our calendar2mite.js and check if everything is still working (temporarily excluding mapping and Mite entries):
const googleAuth = require('./GoogleAuth.js');
const GoogleCalendar = require('./GoogleCalendar');
const dateTime = require('./DateTimeHelper');

googleAuth.auth(runApplication);

function runApplication(auth) {
    const calendar = new GoogleCalendar(auth);
    calendar.getEvents(dateTime.getTimeMin(2), dateTime.getTimeMax())
        .then(events => console.log(events))
        .catch(err => console.log(err))
    ;
}
This should show us the calendar events of the last 2 days (getTimeMin(2) meaning today – 2 days).
Step 5: EventMapper.js
With the same approach as in step 4, we can return a Promise for thegetMappings method and extract a new class EventMapper.js. Because the responsibility of the EventMapper is getting the correct mappings, we can add the getProjectAndServiceMapping method.
const fs = require('fs');
const csv = require('fast-csv');
const config = require('./Config.js');

class EventMapper {
    async getMappings() {
        const stream = fs.createReadStream(config.INPUT_PATH).pipe(csv.parse({ headers: true }));

        return new Promise(function (resolve, reject) {
            const mappings = [];

            stream
                .on('data', row => {
                    mappings.push({
                        keyword: row.keyword,
                        projectId: parseInt(row.project, 10),
                        serviceId: parseInt(row.service, 10)
                    });
                })
                .on('error', reject)
                .on('end', () => {
                    resolve(mappings);
                })
            ;
        });
    }

    getProjectAndServiceMapping (mappings, summary) {
        summary = summary.toLowerCase();

        let element = mappings.find(mapping => {
            return summary.indexOf(mapping.keyword.toLowerCase()) > -1;
        });

        if (element) {
            return [element.projectId, element.serviceId];
        }

        return [null, null];
    }
}

module.exports = new EventMapper();
Step 6: Mite
The last missing module is Mite.js. We can move the initialization of the Mite API library into the constructor of our new class. So we only need to change mite.addTimeEntry(...) to this.mite.addTimeEntry(…) and put it in a new method, and we are one step closer to a better-structured, more readable code. The last thing I extracted was the generation of the data structure for the Mite entries (generateEntryFormat). Sweet little 35 lines of code:
const config = require('./Config.js');
const eventMapper = require('./EventMapper.js');
const dateTime = require('./DateTimeHelper');
const miteApi = require('mite-api');

class Mite {
    constructor() {
        this.mite = miteApi({
            account: config.MITE_ACCOUNT,
            apiKey: config.MITE_API_KEY,
            applicationName: 'CalendarToMite'
        });
    }

    generateEntryFormat (event, mappings) {
        let start = new Date(event.start.dateTime);
        let end = new Date(event.end.dateTime);

        const [projectId, serviceId] = eventMapper.getProjectAndServiceMapping(mappings, event.summary);

        return {
            'date_at': dateTime.formatDate(start), // needs to be YYYY-MM-DD
            'minutes': dateTime.getDurationInMinutes(start, end),
            'note': event.summary,
            'project_id': projectId,
            'service_id': serviceId
        };
    }

    addEntry (entry) {
        this.mite.addTimeEntry(entry, (err, res) => console.log(res));
    }
}

module.exports = new Mite();
Step 7: Putting it all together
Now, that we separated all our responsibilities to single classes and used Promises for asynchronous jobs (events, mappings), we can finally have a look at how our “main” application can benefit from all the work.
As there are two methods we need to wait for, we can use Promise.all and then work with the result values from both. Then we only need to iterate over all events, create the associated mite entries, and send them via API.
This is how the end result looks like:
const googleAuth = require('./GoogleAuth.js');
const GoogleCalendar = require('./GoogleCalendar');
const dateTime = require('./DateTimeHelper');
const eventMapper = require('./EventMapper');
const mite = require('./Mite');

googleAuth.auth(runApplication);

function runApplication(auth) {
    const calendar = new GoogleCalendar(auth);

    const getEvents = calendar.getEvents(dateTime.getTimeMin(2), dateTime.getTimeMax());
    const getMappings = eventMapper.getMappings();

    Promise.all([getEvents, getMappings])
        .then(values => {
            const [events, mappings] = values

            events.forEach(event => {
                let entry = mite.generateEntryFormat(event, mappings);
                mite.addEntry(entry);
            });
        })
        .catch(err => console.log(err))
    ;
}
Interim report
So what have we achieved so far? We moved from around 200 lines of almost unstructured code in one/two files to a main entry point file (calendar2mite.js) with six additional classes that are easy to read and even easier to comprehend their usage. Apart from being easier to read and maintain, the code is now automatically testable, too. We can write unit tests for all the classes now where unit tests are necessary.
And this is exactly what we will do in the next blog post!